After countless nights of trying to Face-Time and standing my phone up against water bottles, small boxes and a little teddy bear, I finally had enough. As any engineer would do, I told myself the only logical solution is to do the following:
- Design my own iPhone stand
- Buy a 3D printer (Micro 3D)
- Print prototype of my design and then write about it as the first post of my very own design blog.
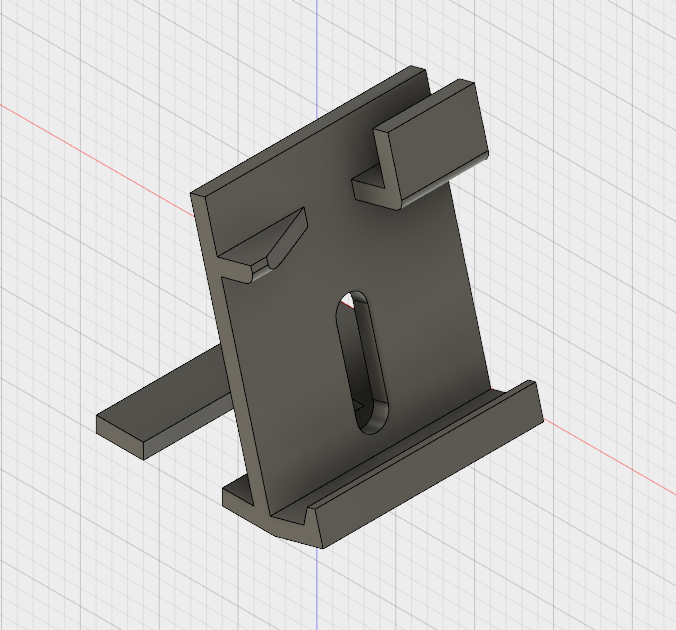
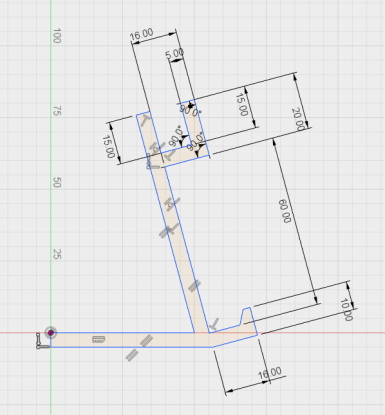
I sketched up a simple design in Autodesk Fusion 360 (which is available for free as a non commercial for enthusiasts).
I didn’t want to try anything too fancy because I wanted to test the basic capabilities of the Micro 3D printer. Up until now I had only done some small test prints (and also one big failed print), but I’ll cover this more in my review of the Micro 3D printer and advice for people just starting in another post.
It took a couple iterations and modifications, mainly because I had to shrink the height in order to get the model to fit inside the print area of the Micro3D. Once special consideration I had to keep in mind was the Center of Gravity of the phone when mounted on the stand. I had to make sure that the base of the stand reached far back enough such that the entire assembly did not tip over when an iPhone 6 was mounted on top of it, but also keep the base short enough as not to exceed the print area.
Another important to thing I had to consider when printing was the overhang structures. These are structures that, when printing, will technically be floating over the air. In this iteration of the iPhone stand I had to make a gradual overhang so that I wouldn’t need the printer to print and use any support material to support the overhang.
Feeling pretty good about the model, I exported it to an STL file and sent it to print. Your first print is always your scariest one. Having failed one previous print (I tried printing a spool holder without, well, having a spool holder) I was already on edge. Most people also don’t realize that 3D printing takes quite a while and is not like laser printing your English Class essay. This particular print took round about 7.5 hours to print.


7 hours later, this is what I have! The perfect solution to my every day problem. I almost never put my phone down in my room without using this iPhone stand.
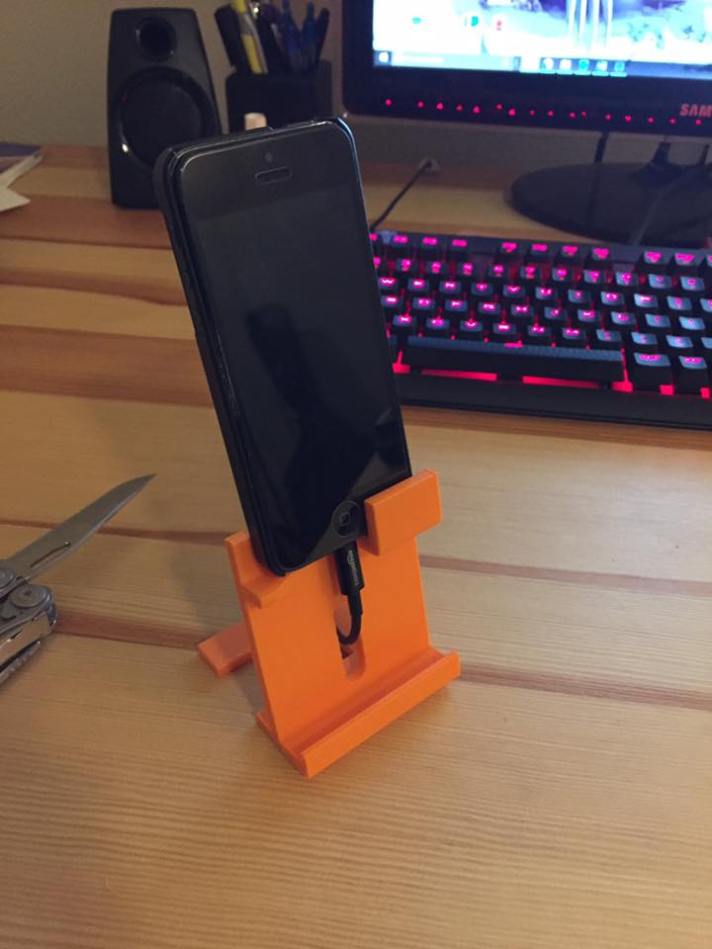
Features include:
- Upright slot and hook to hold the phone.
- Cable port and gap for the cable to come through and plug into the iPhone.
- The bottom part is actually another slot for the phone to be place horizontally but it is too short. This is because I had to shorten the the height of the design in order to get it to fit inside the 3d printer’s print area.
If you would like a copy of the CAD file used to print this please contact me!
